How to Build Your Own Ecommerce Photography Studio
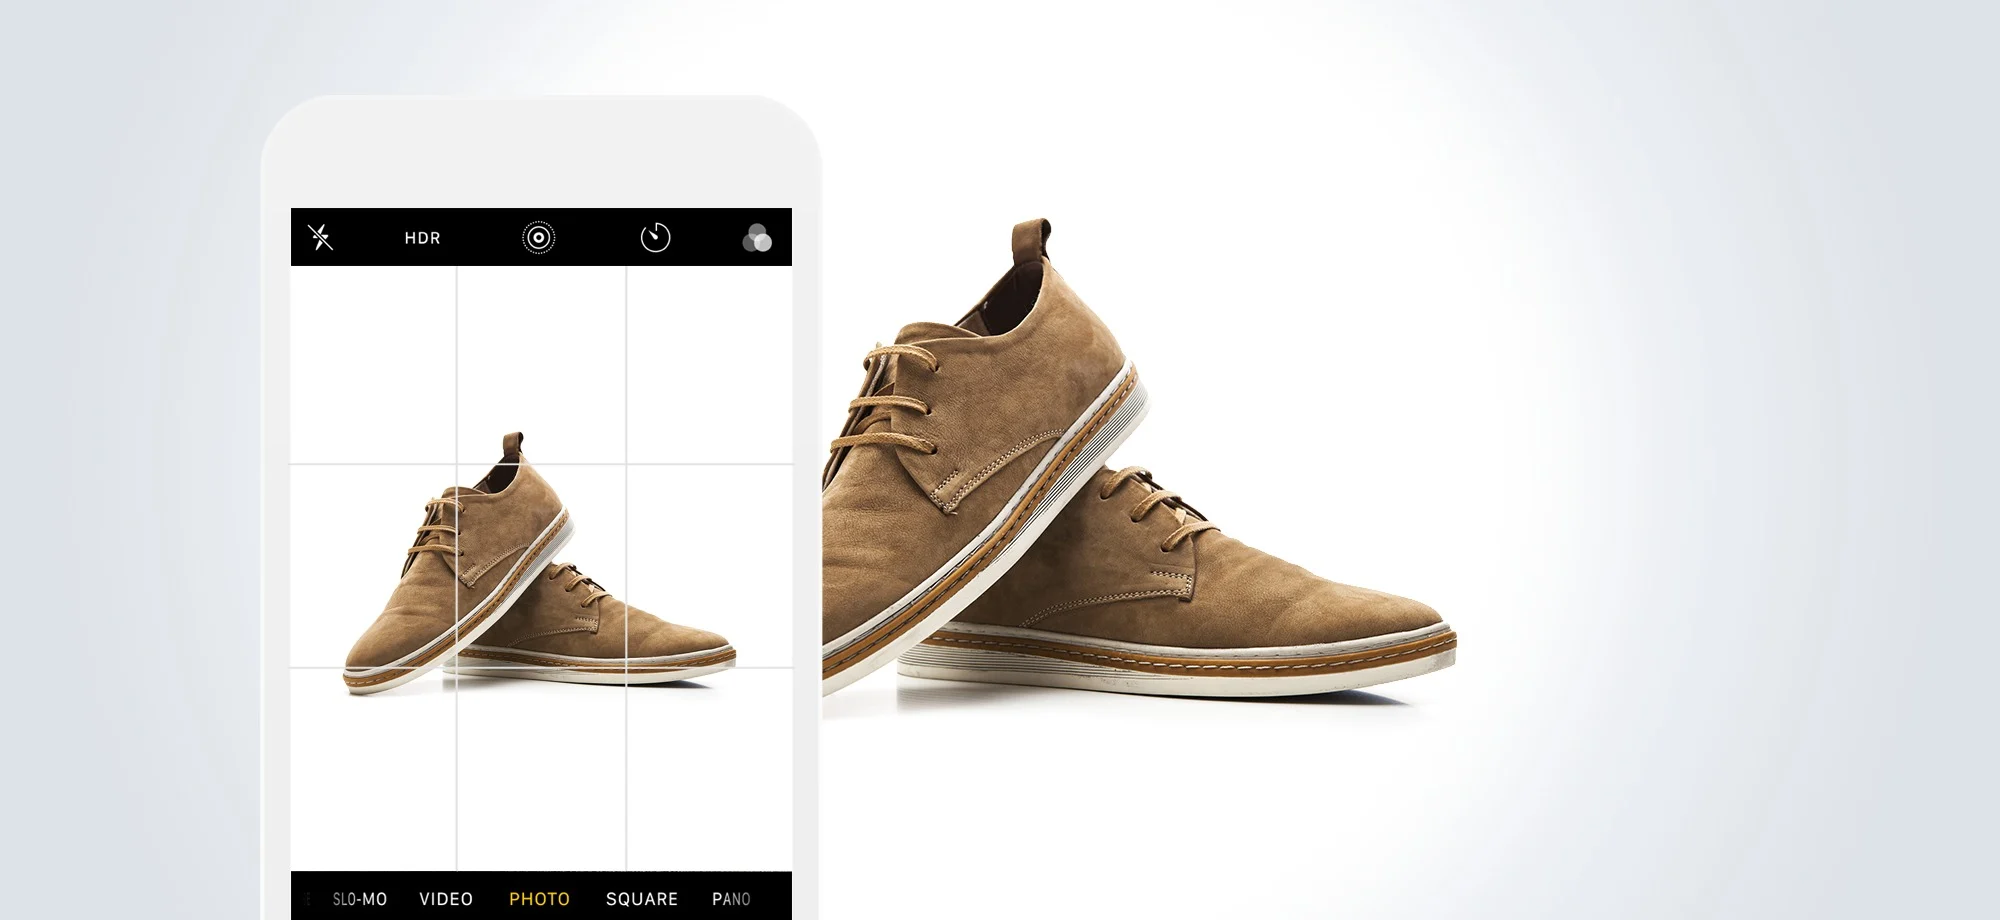
Whether you are a big box brand or a scaling SMB, if you are an ecommerce retailer, you are in the business of production.
Your success often boils down to the efficiency of your workflow — how fast can you:
source products
produce imagery
create website content
sell
Organization is important for any type of workflow — especially when it comes to preparing your merchandise photos for your online store. Detailed preparation, a customized workspace, simple processes, archiving and transferring systems, and communication are all necessary components for streamlining your photo production workflow and achieving maximum productivity.
To help you evolve your post-production ecommerce photography process to the industry’s best practices, we’ve gathered everything you need to know to streamline your methods.
The 5 Components of an Efficient Workflow
All product photography workflows boil down to five components:
Organization
Preparation
Test shooting
Shooting
Post-production processing
In the following sections, we’ll walk you through each of these steps to help you setup your own detailed plan.
1. Organization
Catalog Your Products
Organization is the first key to maximizing your company’s productivity. In an ideal situation you will have all of your products paired (if applicable), and cataloged by color, description, size, associated tags, product name and any other identifying info.
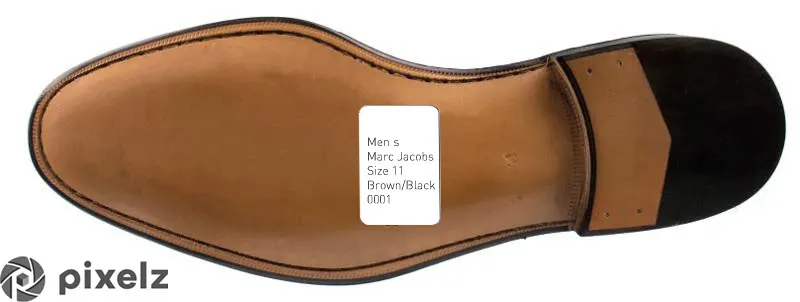
The tag included on this shoe provides clear identifying information about the product.
It is also recommended that you attach a small tag to each product, as shown above. This tag should include basic identifying information you cataloged.
Many times this info can be found on the packaging from the brand, but you can also create your own unique system. If you sell unique or original products, you will need to create your own.
Make sure that the item number you assign to each product matches a folder on your computer or external hard drive that will provide all identifying information and assure that your products are readily available and identifiable.
This naming and tagging structure will help to upload the correct images to the correct product on your backend –– and it will also help to reduce incorrect sending of product (i.e. solve for inventory management issues) as you grow.
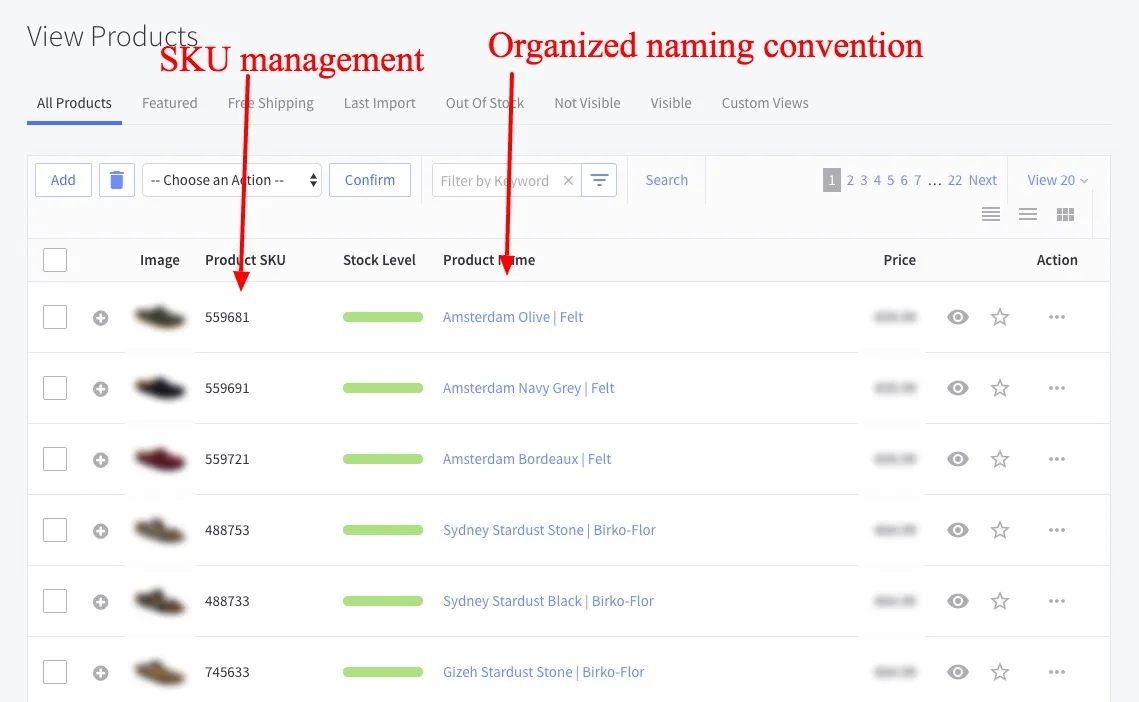
Setting up a naming convention early on will help to decrease product management errors on your ecommerce backend.
Catalog Your Images
Just as it is important to organize your products, it is equally important to organize the digital photographs and files associated with them.
You can choose to go through your images, sort them into file folders and rename them by hand, or you can leave that to an image cataloging program like Adobe Lightroom.
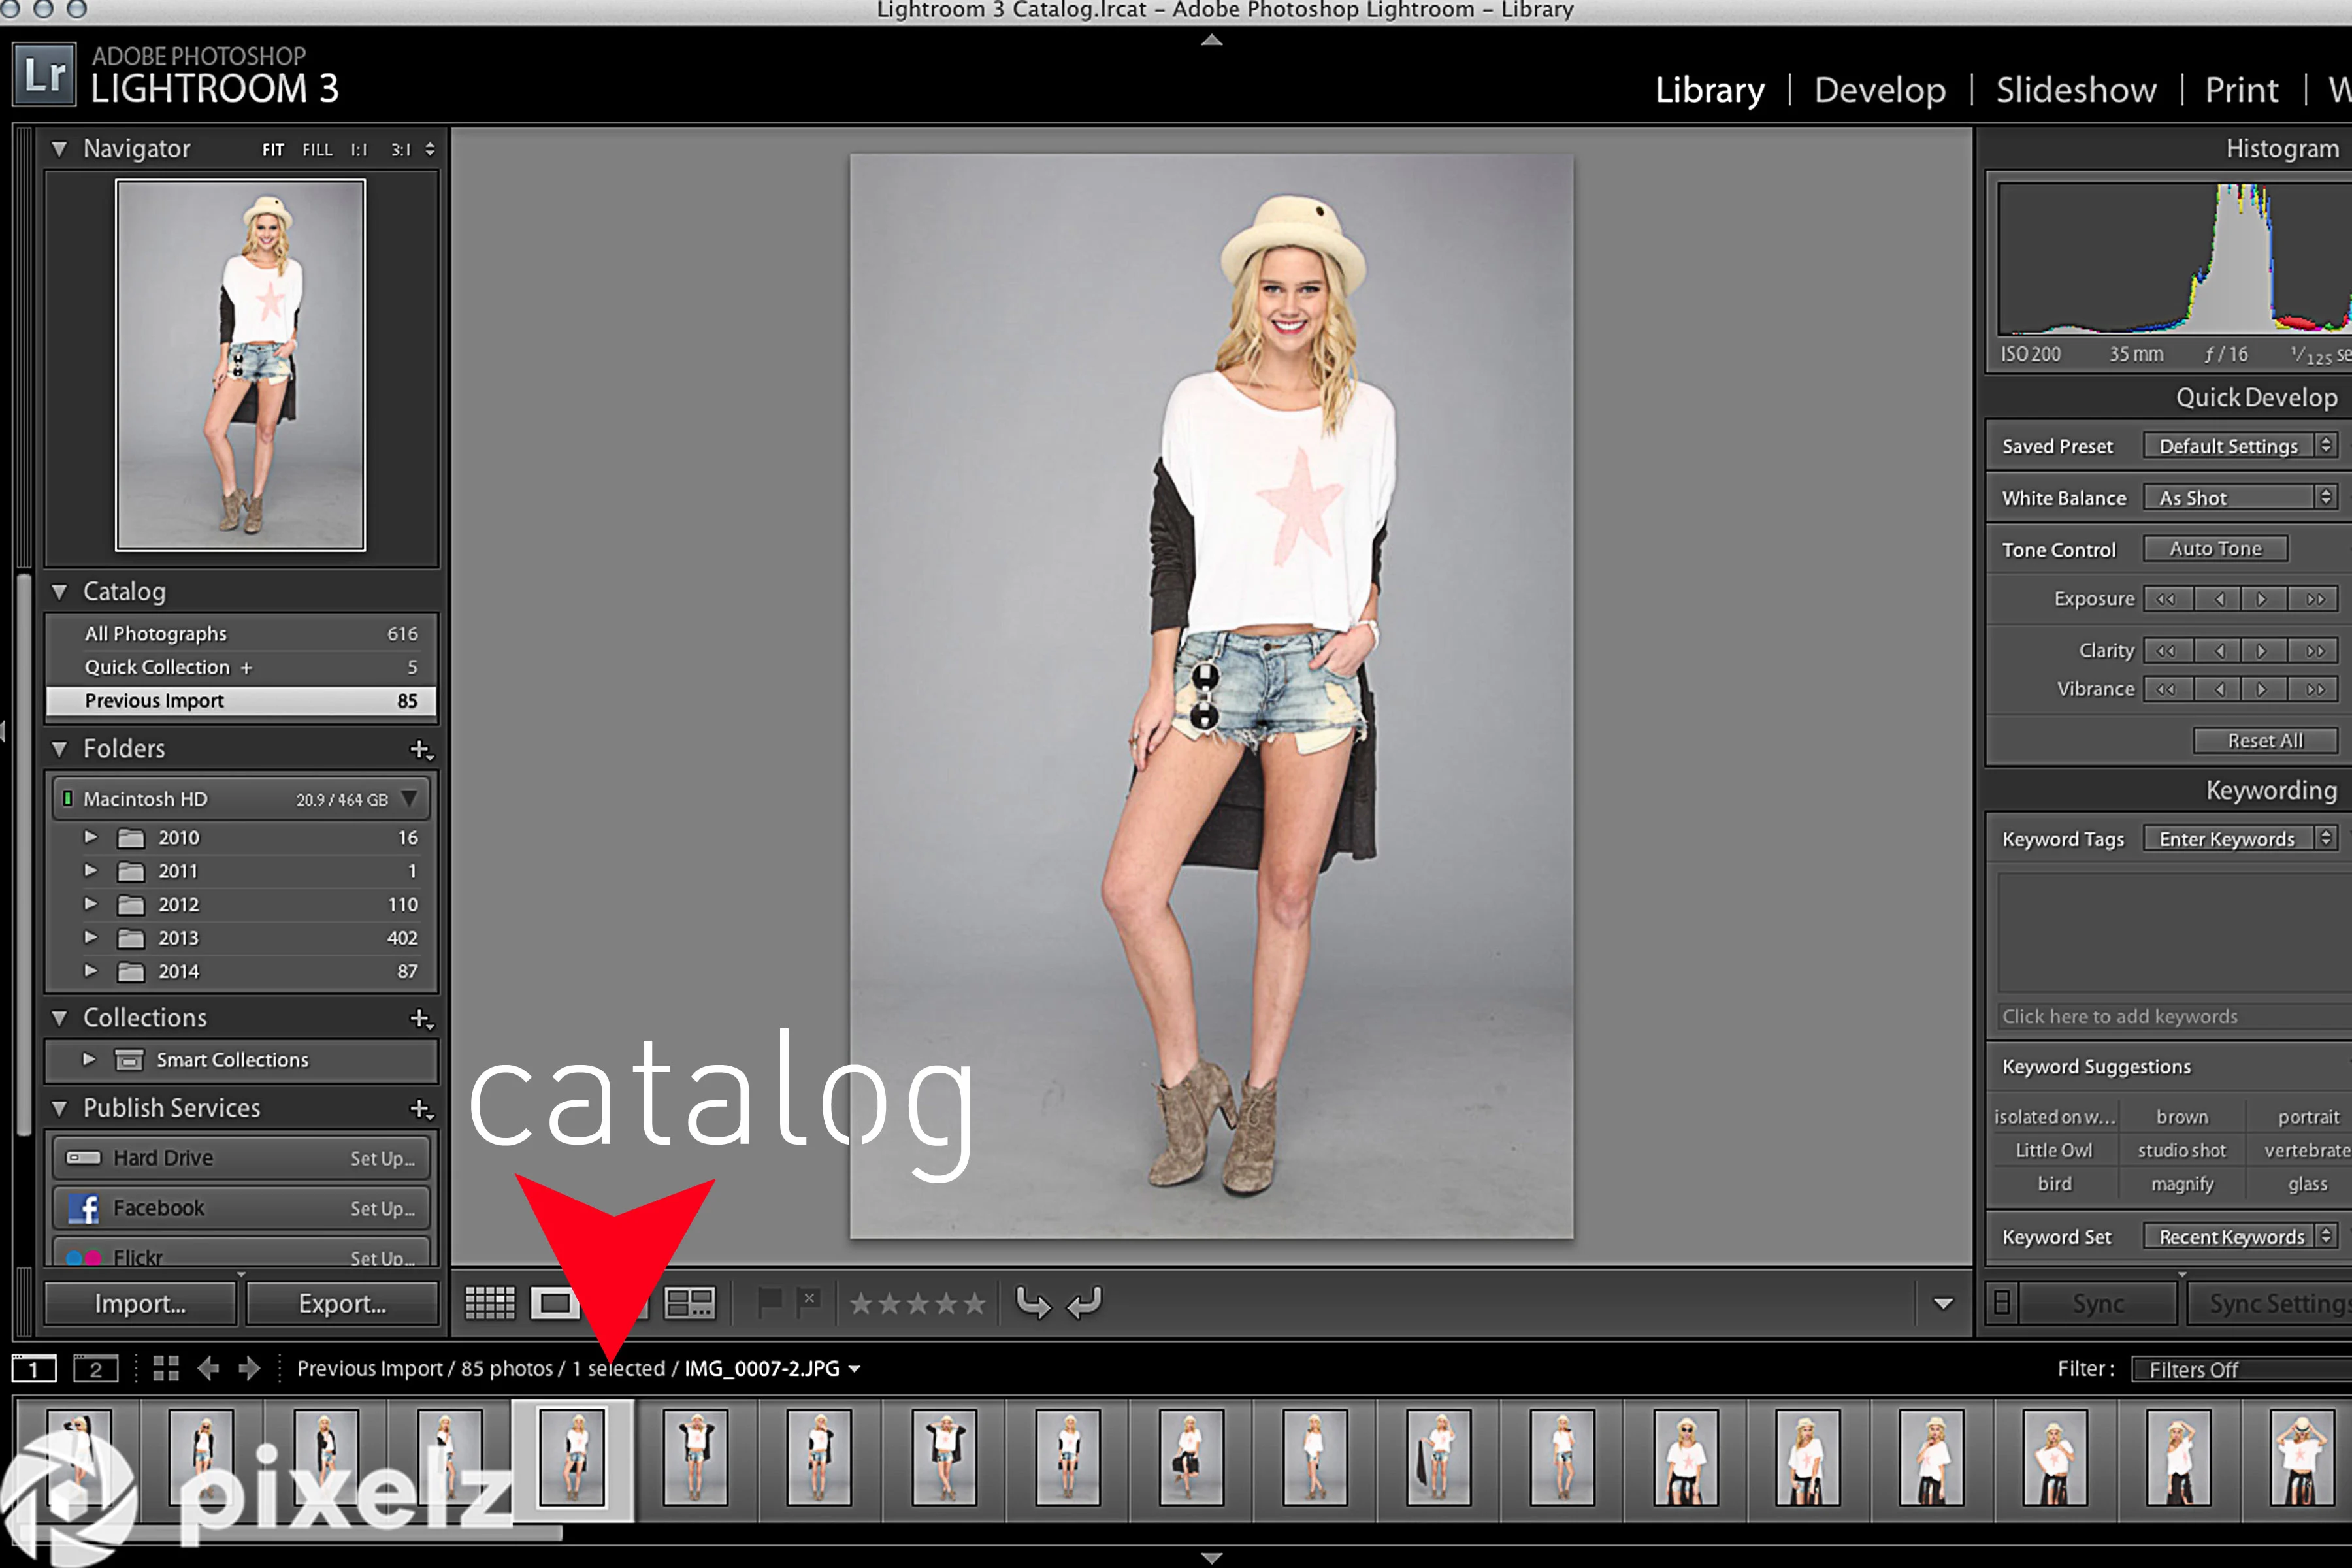
View images in Adobe Lightroom and make quick batch adjustments
Cataloging software is useful because it allows you to:
see all the images that you have taken
filter through them by deleting or selecting images
rename files
make “batch” edits to multiple images at one time
Some programs are better than others at cataloging imagery, but Adobe Lightroom is generally considered to be one of the most cost-effective. With it, you’ll also be able to rename and locate files, as well as perform some post-production processing.
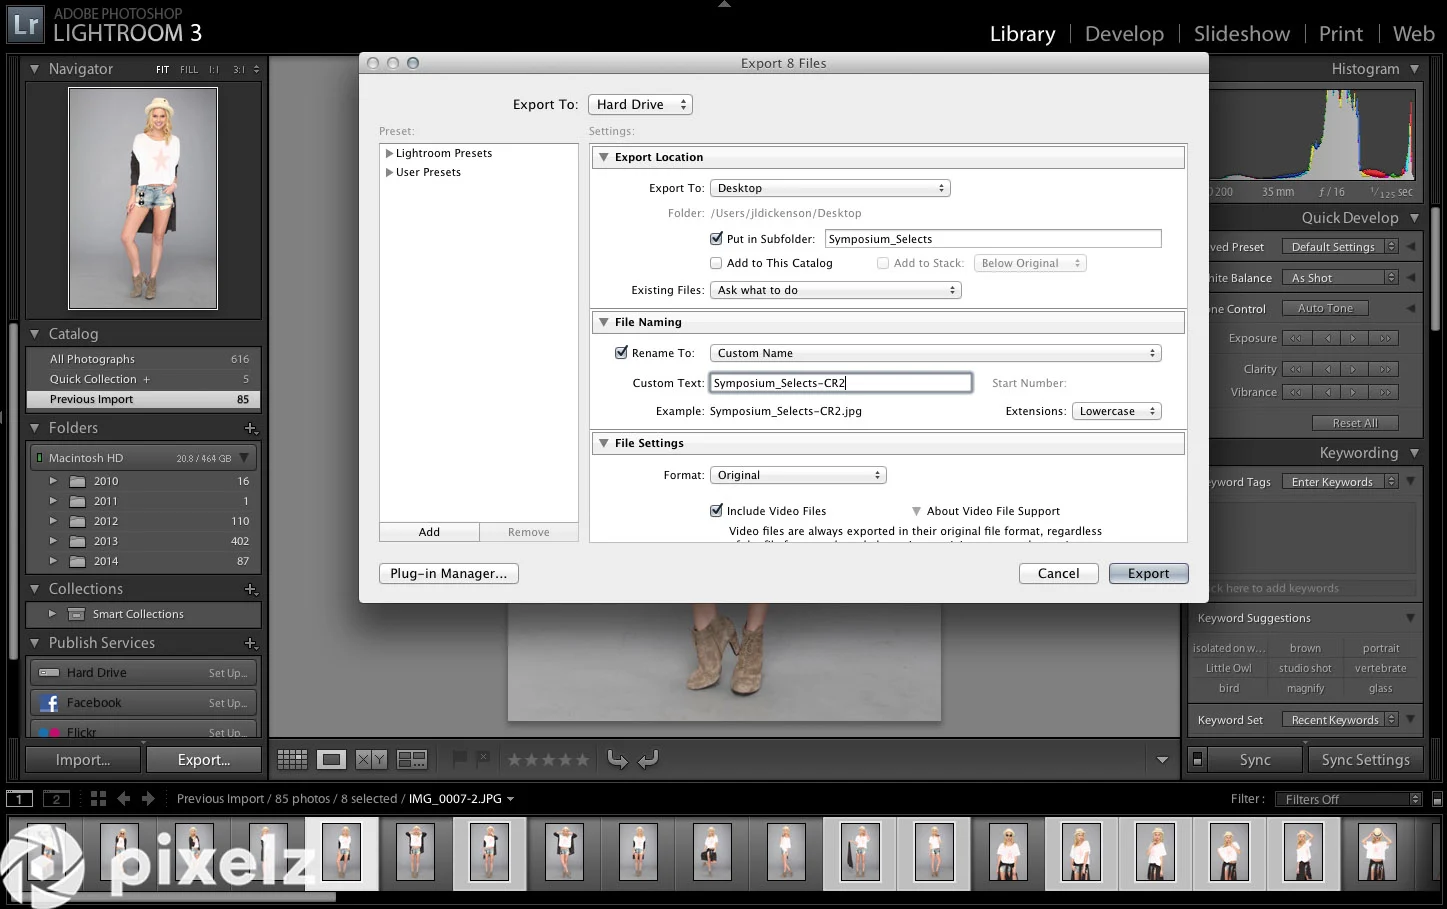
This is the export screen in Adobe Lightroom where you’re presented with a number of different settings to customize the export.
Ideally, by the end of your cataloging process, you’ll have the product name, description and date included in the name of the file folder where you store your images and perhaps even in the individual filenames themselves — and then you’ll create backups.
Backup Your Images
You also want to make sure that you store your images in more than one place.
External hard drives are great for this. Look into finding an external hard drive that is compatible with your current computer and software, of course, but it would also benefit you to look for one that is compatible with both PCs and Macs so that when you start sharing files with others, you don’t run into conversion issues.
External hard drive prices have plummeted, with 1TB+ drives available for less than $99 (depending on brand and storage) even in name brands like LaCie.
Another great option is virtual cloud storage.
Saving your work into a virtual cloud, instead of saving it onto a physical drive, can make it easier to access files from different locations and provide extra backups in case the originals are lost.
A few cloud storage solutions include:
Dropbox
Google Drive
Box
Bitcasa
Apple’s Cloud Storage
In most cases, if the files are valuable to you, you should store them on both an external hard drive and in cloud storage. Some image management programs, like Apple’s Photos app, may automatically backup your images in the cloud.
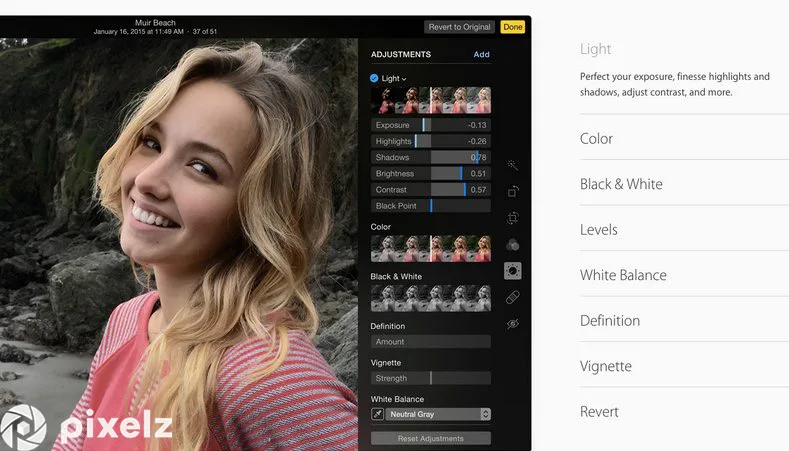
Apple’s image management app Photos.
However you choose to classify, organize and back up your images, make sure to develop a specific step-by-step process and document that process somewhere for reference so that it gets done and gets done efficiently.
Bitcasa is one of many cloud storage companies. They offer their services for $10 monthly.
Create a Workflow Manual
Perhaps more important than any of the organizational strategies we have discussed thus far is creating a customized workflow guide or manual for your company.
This manual should include every detail of your photo production workflow methods.
As your company either grows in size or you begin to outsource work to other companies, you will need structured guidelines for how the work should be done in order to maintain consistency.
You will need to update your manual as often as you update your processes. Communication is key in the production business. Never leave anyone out of the loop because, without one functioning part, you will lose momentum in the larger scheme of your production workflow.
2. Preparation
Prepare Your Products
After you have organized your products and work area, you should prepare your products to be photographed.
Be prepared to spend adequate time prepping each item — even the smallest speck of dust will be visible in a product image.
While you will be able to fix mistakes in post-production processing, advanced editing is time consuming and requires a high level of proficiency with cloning and healing tools, so it is better to fix as much as you can manually before the ecommerce photography shoot.
For example, clothes should be:
clean
free of large tags
Steamed
examined for defects
You should follow a similar inspection and preparation process for other types of products as well.
Shoes should be wiped and shined.
Jeans should be pressed.
The tiniest missing jewel on a necklace should be replaced.

The are several types of tools available to use to clean and prep your products: brushes, wipes, blowers, etc.
Organize Your Products
After you have ensured that your products look their best, line all of your products up in the order that you plan to photograph them, along with their identifying information.
Picture a grocery store shelf, but with products out of their packages, clean and ready to shoot.
If you have cataloged your products correctly, then you should be able to compile an ordered list and simply mark them off as you progress through the photoshoot.
Our products will be photographed in this exact order and they are all arranged accordingly in our studio.
Select a Model
If you will be photographing your product on a live model as opposed to the ghost mannequin method, make sure that the model matches the “look” and style of your product.
Research similar brands for inspiration and see what kinds of models they use. Here are a couple examples from various industries:
Sports + Outdoors
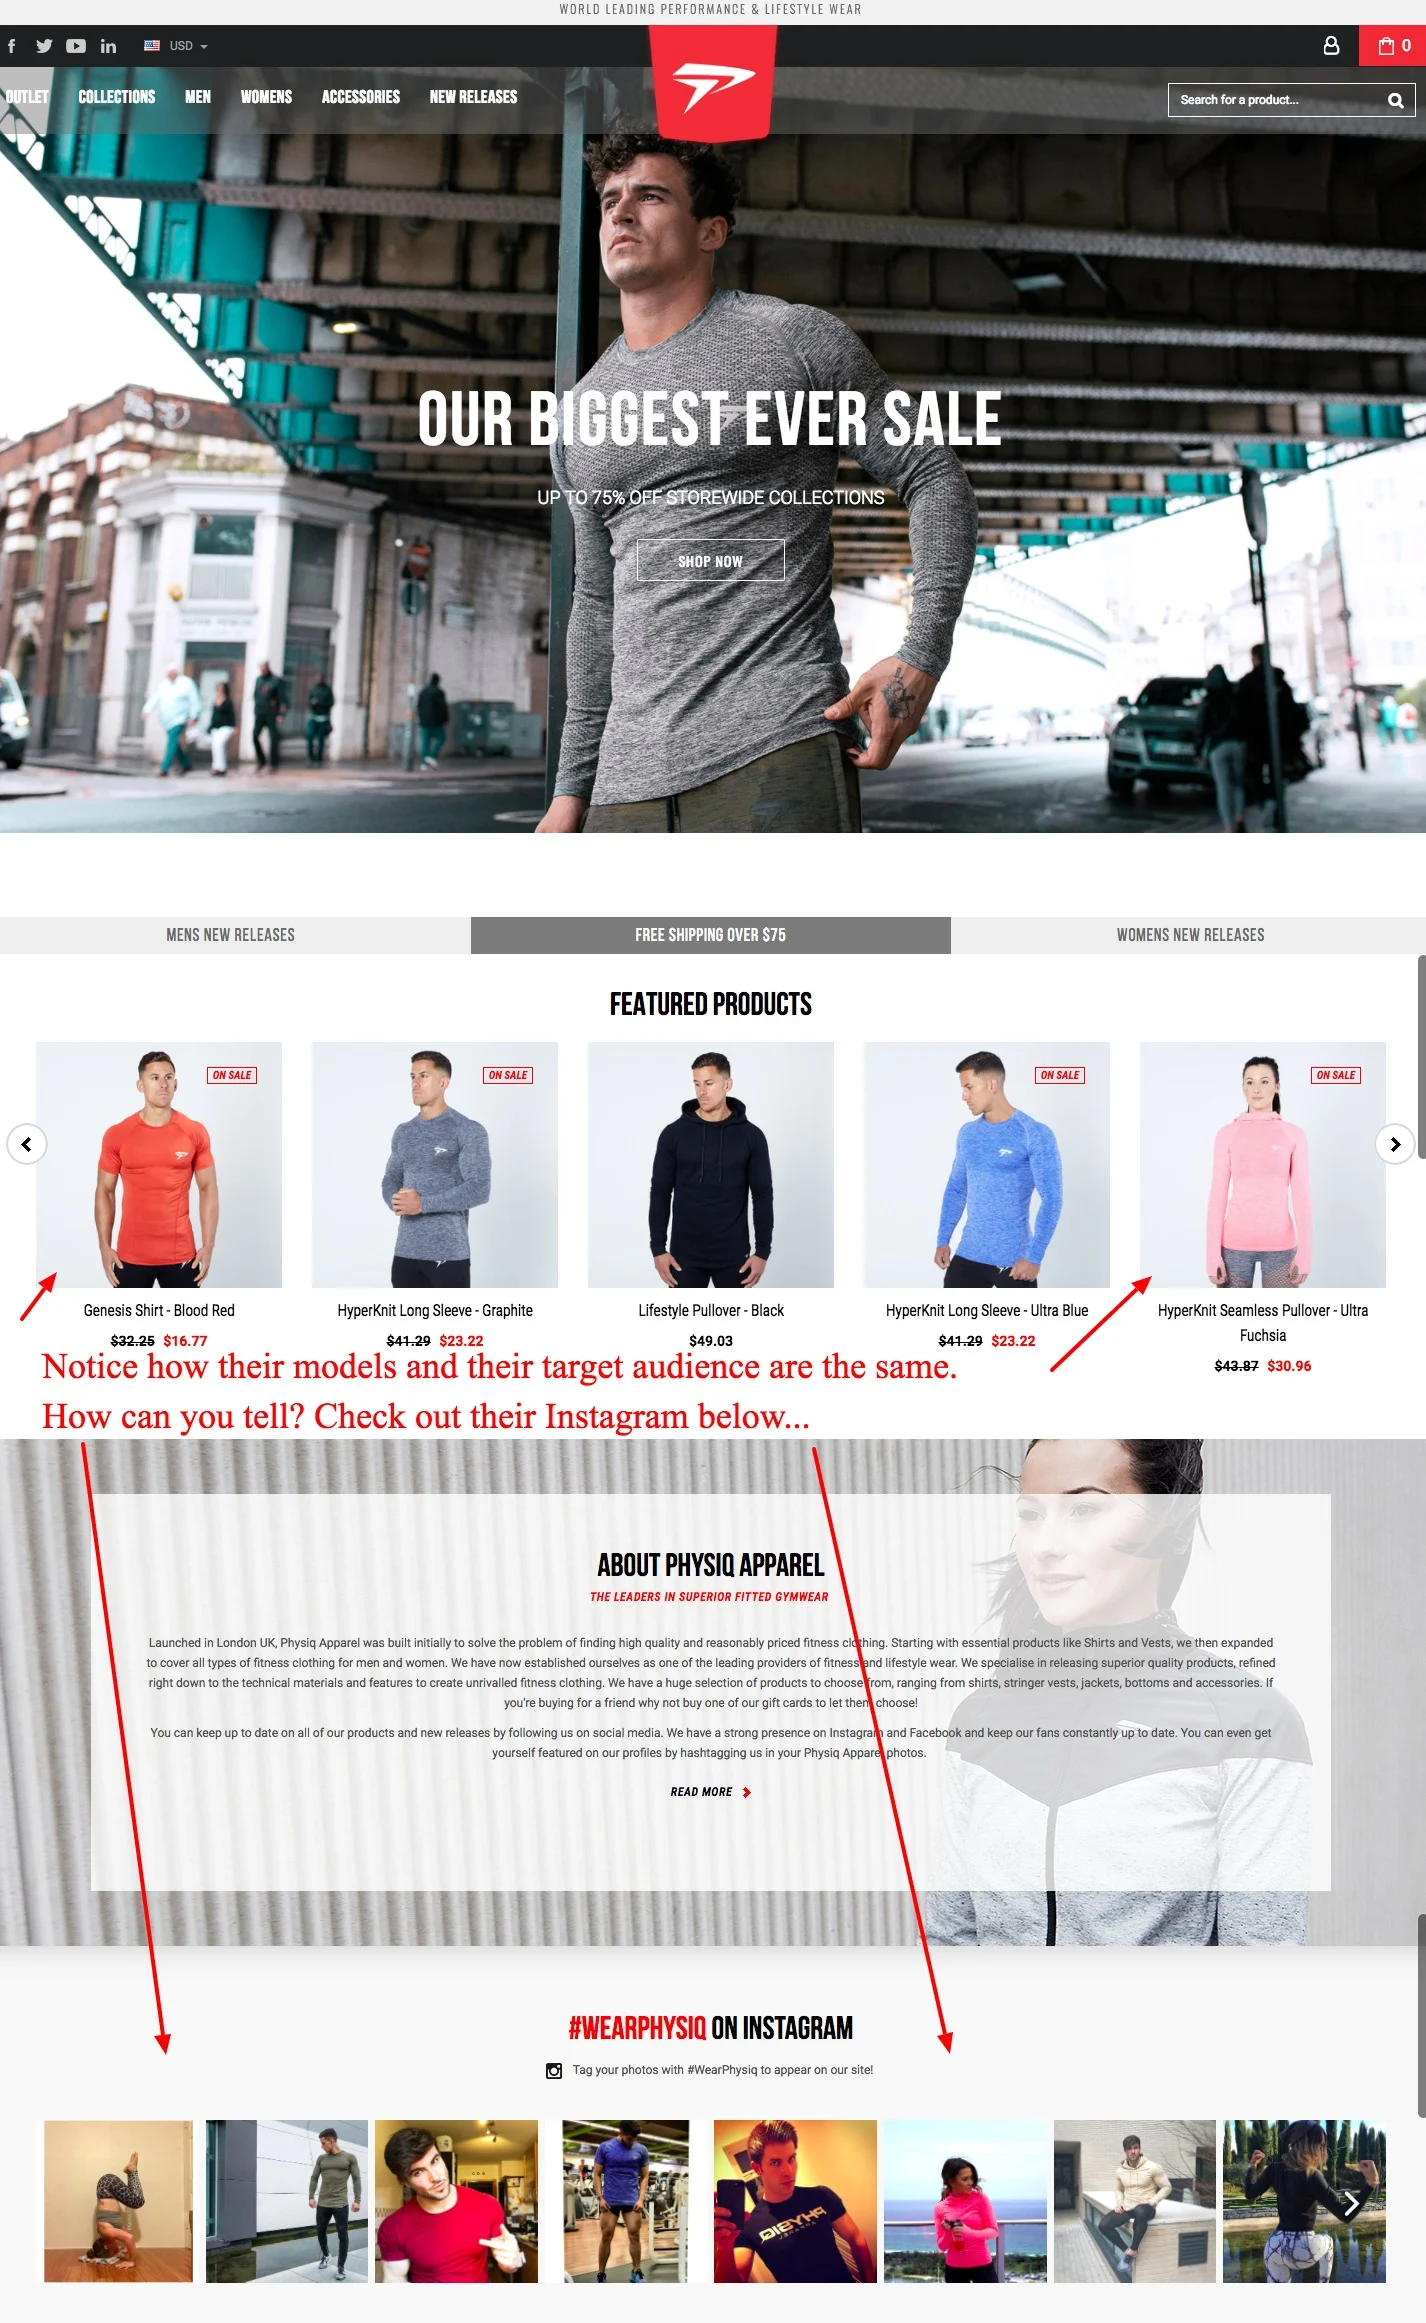
See how Physiq Apparel ensures that their models reflect the demographics of their target audience.
Fashion + Apparel
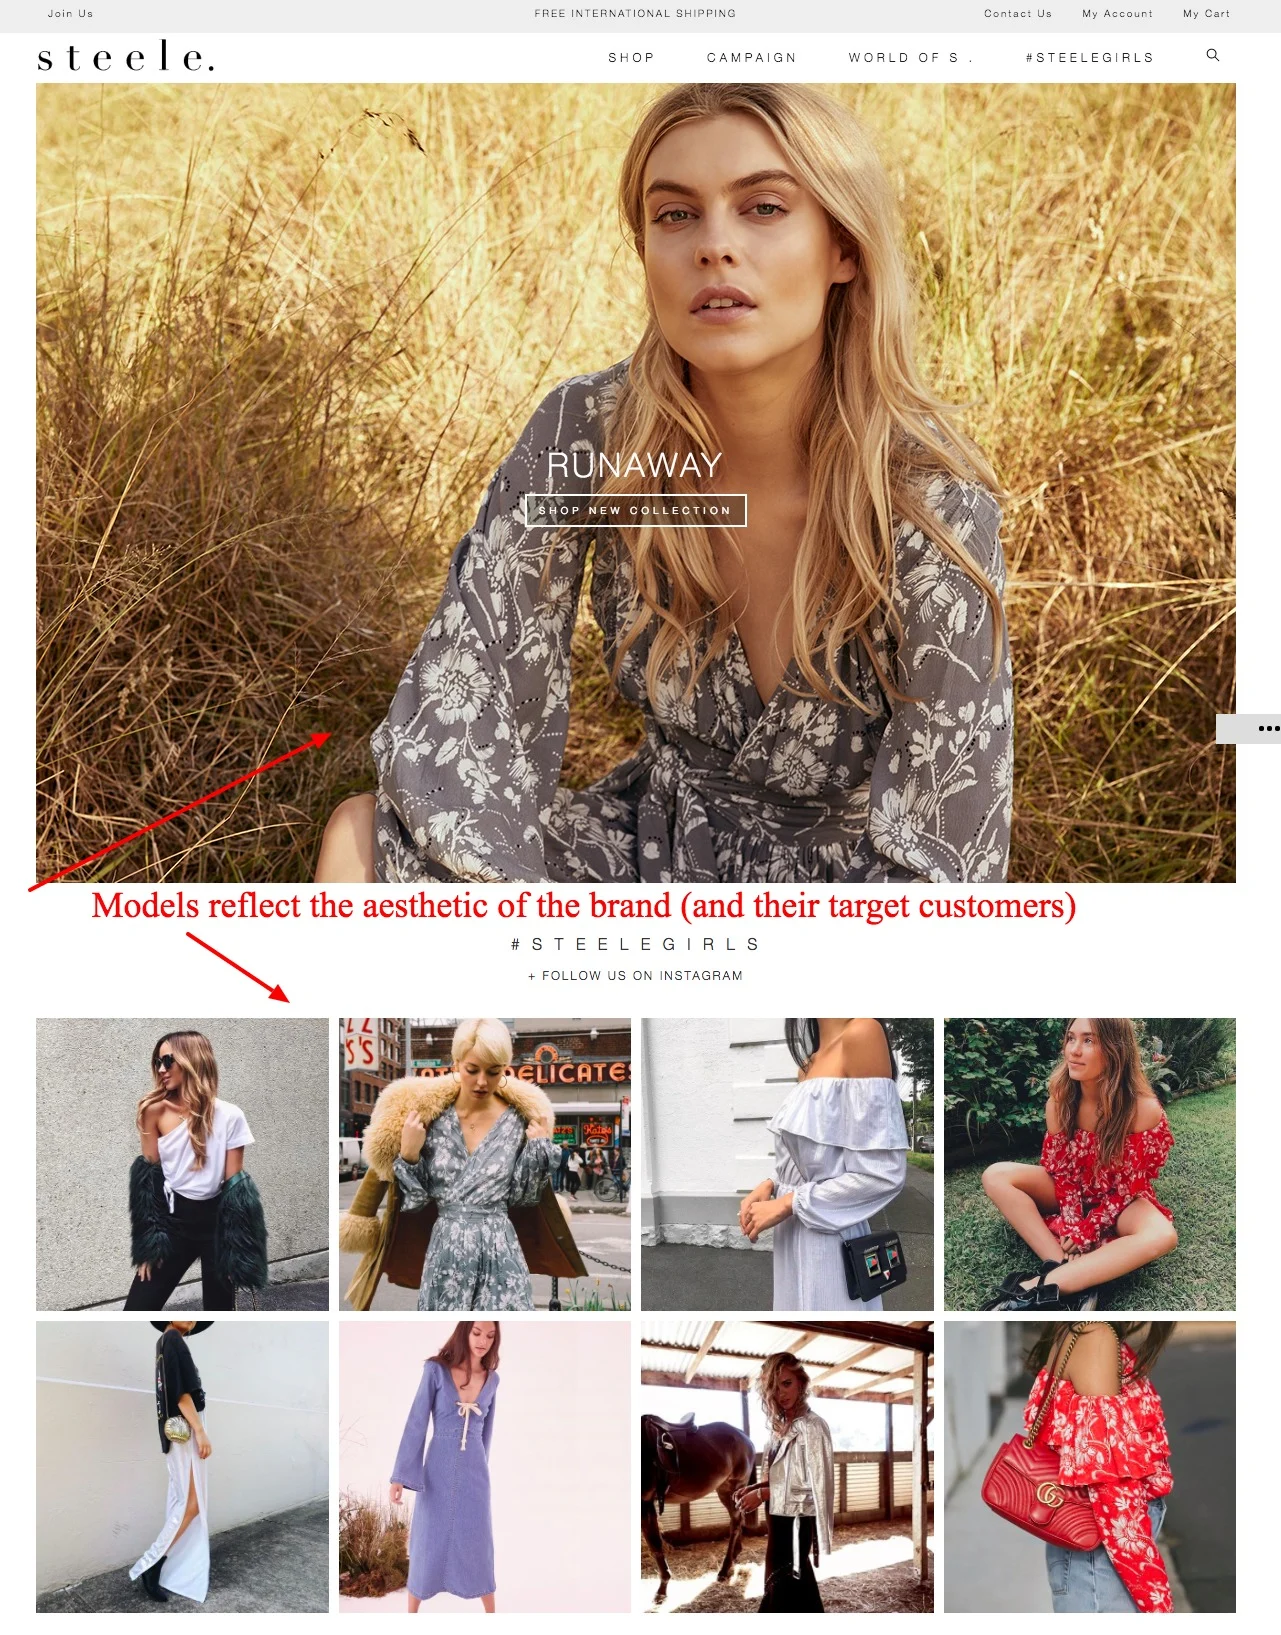
In the same vein as the example above, STEELE’s models reflect the aesthetic of the brand’s target audience, both in lifestyle images on the site, in the product photos as well as on their Instagram feed.
Choose a Camera and Lens
For basic product photography, we recommend the Canon PowerShot SX510 for $160 or the Nikon D53000, starting at $599.
Generally speaking, the more you pay for a lens, the better quality glass and internal structure the lens contains.
High-end glass is what will really makes a difference in the quality of your images, not so much your camera.
With that in mind, most professional photographers would recommend that you skip buying lower end “kit” lenses and third party lenses and instead purchase professional-grade lenses from the manufacturer that produced your camera.
Beyond quality, your lens(es) of choice should depend on the types of products that you need to photograph and the level of consistency that you want to establish between your catalog images.
There are two major types of lenses:
Zoom lenses (e.g. 24-105mm) that allow the user to choose between a range of focal lengths. Zoom lenses tend to sacrifice some sharpness for flexibility and prime lenses sacrifice flexibility for sharpness.
Prime lenses (e.g. 85mm) that provide only one focal length.
If you work with live models or a wide variety of products, a flexible zoom lens might be the most efficient choice for you.
However, if you only photograph ceramic bowls and you need every photograph to look exactly the same except for the pieces themselves, a prime lens can offer quality that a zoom lens can’t.
For zoom lenses, choose a focal range that contains all of the focal lengths that you commonly use to photograph products. Some product photographers will only need a 24-70mm lens, while others may get more benefit from a 24-105mm or 24-120mm lens.
What type of lens should I use?
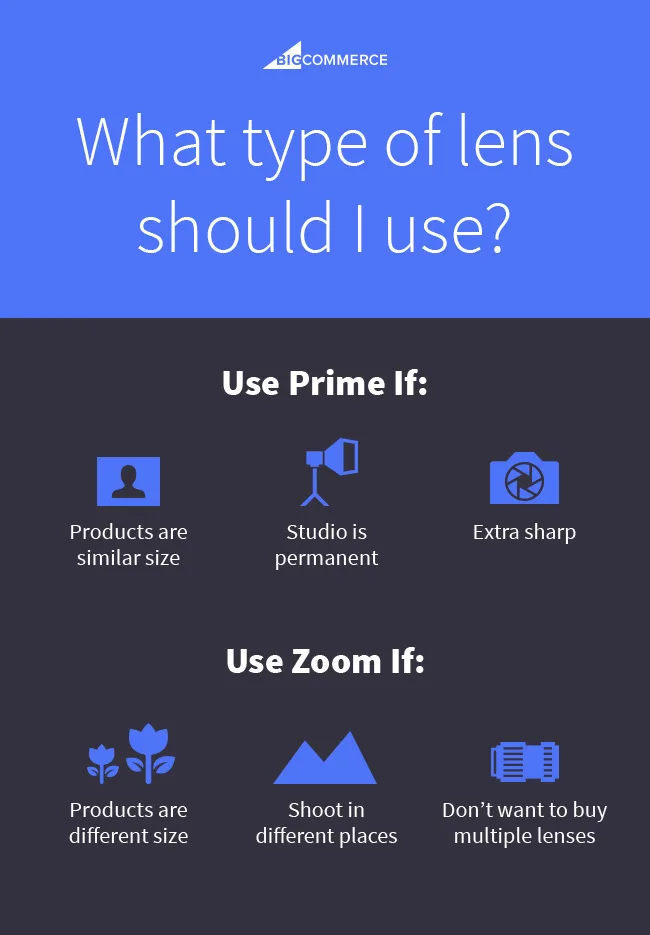
If you’re going to be consistently shooting similar products in one location, a prime lens is probably worth it — and not all prime lenses are expensive. The Canon “Nifty Fifty” EF 50mm f/1.8 is extremely popular and great value at the low price of $110.
If you’re going to be moving around shooting different products in different places, and you don’t want to buy several prime lenses, go for a zoom. They may not be quite as sharp, but you can still capture high quality images with proper care.
Select Image Capturing Software
Spend a little time researching programs to capture your imagery. You may find it easy to simply shoot in-camera with your CF or SD card and then transfer the images over to your computer via card reader at a later time.
However, image capturing software can help you shorten this process while providing additional benefits.
These programs will allow you to shoot with your camera “tethered” to your computer and will automatically upload any images that you capture into a designated folder. You can read this blog post for in-depth instructions on how to tether with Adobe Lightroom for product photography.
Tethering will eliminate unnecessary transferring steps, give you a live preview, and jumpstart your post-production process.
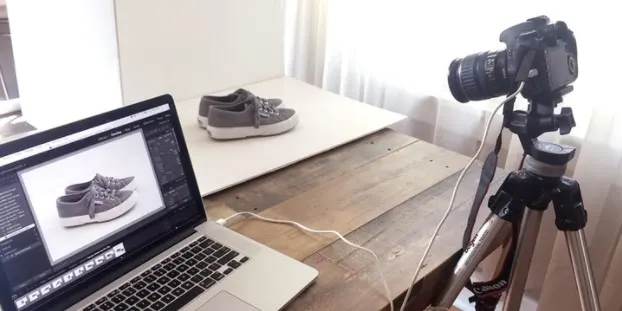
Tethering with Image capturing software like Adobe Lightroom can streamline your workflow.
Simply pressing your computer’s spacebar will fire your camera and allow for immediate image review. You can monitor and adjust exposure and other camera settings right from your computer because the program communicates directly with your camera.
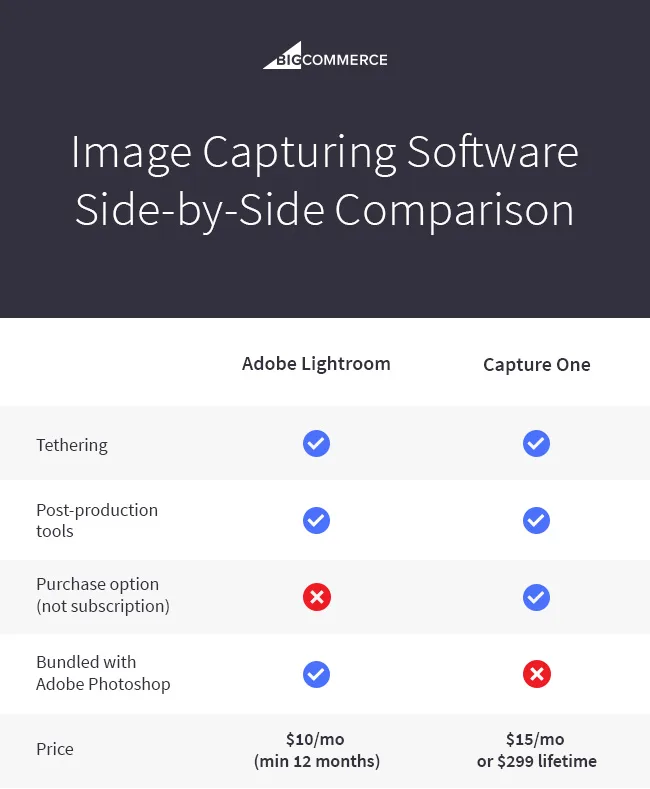
Adobe Lightroom is a great program at an affordable price, and is probably the best entry point for new product photographers (especially since it’s bundled with Photoshop for $10/mo).
The next step up from Adobe Lightroom is Phase One’s Capture One Pro. If you’ve ever been in a professional photography studio, odds are you’ve seen Capture One at work.
The tools are similar in many ways, but where Lightroom tries to be many things for many different types and levels of photographers, Capture One is designed for studio professionals. It’s faster, more customizable, has more functions designed for collaboration with clients, and claims superior image quality.
Capture One is available as a monthly subscription for $15/mo, or can be purchased for $299. It’s worth noting that a limited version, Capture One Express, is free for many supported Sony cameras like the mirrorless a7-series.
Image Capturing Software Side-by-Side Comparison
Select Post-Production Processing Software: Adobe’s Suite of Tools
If your image capturing software does not include advanced post-production processing capabilities, you will need to purchase a program like Adobe Photoshop that will allow you to make these types of edits.
Photoshop is the most well known and powerful image editing program, and it works in perfect tandem with Adobe Lightroom. Adobe has shifted to a subscription model in recent years, so you’ll need to pay monthly for Photoshop unless you want to buy an outdated version; the Adobe Creative Cloud Photography plan combines Photoshop and Lightroom for $9.99/mo.
Customize Your Studio Workspace
For e-commerce products, photos should look clean, simple and consistent. The best way to do this is to build a tried-and-true studio setup and customize it to fit your own needs.
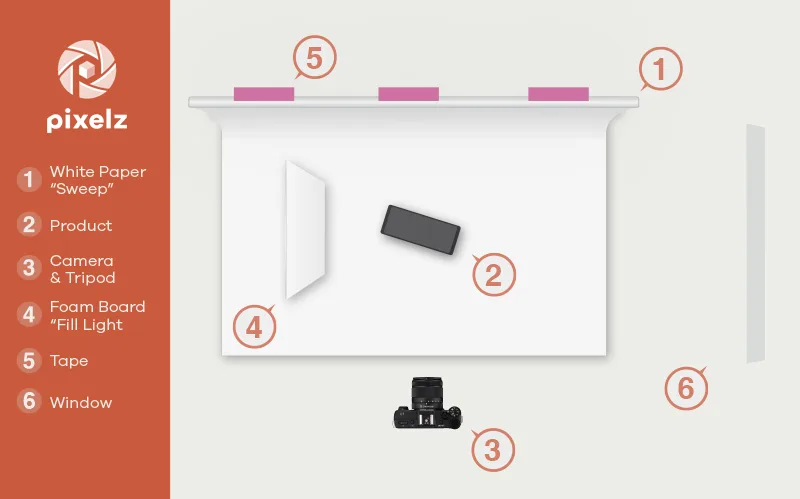
You can learn how to set up a simple do-it-yourself studio space like the one in the image above by following our detailed step-by-step walkthrough.
To get you started, you will need the following items to build the above photo studio:
White seamless paper roll
Your product
Camera and tripod
Foam board for fill light
Gaffer’s tape
Window light
Accident-Proof Your Studio Workspace
After you have chosen and built your studio workspace, it is a good idea to take steps to prevent accidents.
For example, carefully position your computer, product, chair and lights in areas where you won’t make the work more difficult or trip yourself up.
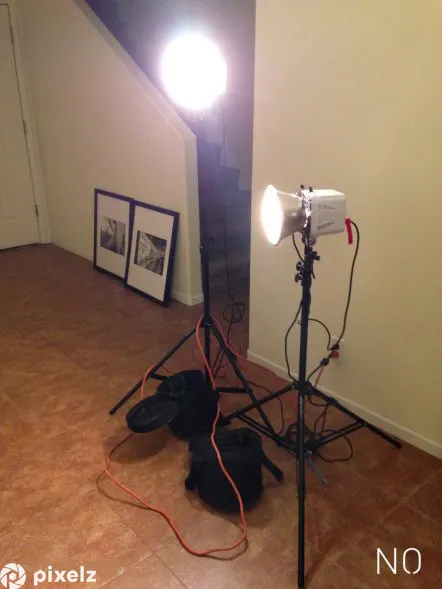
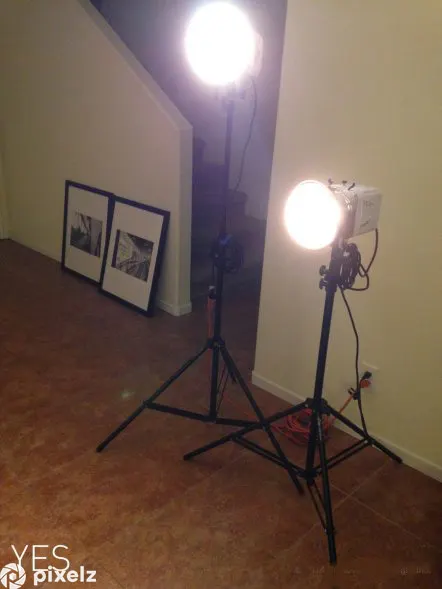
Instead of allowing cords to run wild throughout your workspace, coil them up neatly and place the coil away from walkways. Also, wrapping the cord once under the leg of the light stand will drag the light, rather than trip you and topple over the whole light.
If you are working with artificial lights, remember that they use a decent amount of power and are expensive to replace.
There is no need to give yourself the opportunity to trip over cords or knock things over and risk having to pay for it twice because you broke equipment and injured yourself.
Here are a few affordable friends:
Gaffer’s tape
Velcro
Zip ties
Sandbags
Clamps
Coil cords near light sources and tape them down to reduce the risk of tripping. Use a heavy duty multi-outlet and extension cords when you can.
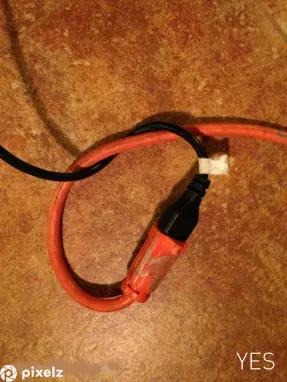

If you can think of anything to make your work space safer, do it!
3. Test Shooting
Document Studio Measurements
After you have selected your equipment and have built a customized studio workspace, it’s time to set up your first product. Once you have it in place, take a test shot to perfect your camera settings and composition.
When you have captured an acceptable image of the product, measure, mark and document everything.
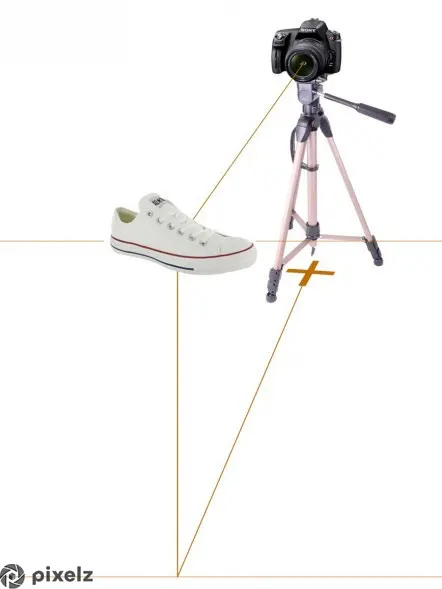
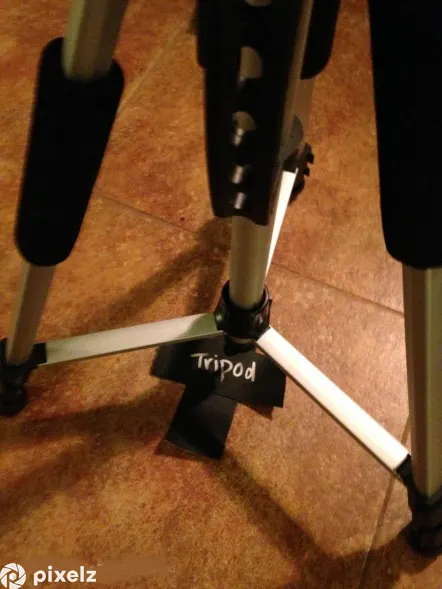
Measure and mark the distance from the floor to the top of the shooting surface, the distance from your tripod and camera to the product and even the distance between the lowest part of your camera lens and the floor.
This may seem like a waste of time, but it is absolutely necessary if you want to create consistent images for your website.
Even if you leave your studio set up indefinitely, accidents happen, and if you don’t have exact measurements, you may be forced to reshoot if you can’t figure them out again.
Document Camera Settings
The same principles apply for camera settings, especially in manual mode. After you perfect them, write them down!
And that doesn’t just mean shutter speed and aperture settings — it means:
Shutter speed
Aperture
ISO
White balance
Focal length
Anything else that might vary from shot to shot unless set specifically
You’ll find most of your settings on your camera’s display screen.
For instance, if you are photographing a product on a model, you may shoot the image with a shutter speed of 1/250, an aperture of f/16, an ISO of 200, and a focal length of 50mm.
If you’re using artificial light, you’ll need to make a note of those specifications as well.
Perhaps you’re using a 5200k fluorescent studio light on high power supplemented by natural window light on the product’s left side. Make sure that all of this information is well-documented so that you can re-create the exact same lighting situation from shot to shot, and even from photoshoot to photoshoot in the future.
Choose Image Quality
Be aware of the different types of image quality settings that are available with your camera so that you can pick one that suits your needs and use it consistently.
If there is a chance that the images will be used for different types of media and not just on the web, then you may wish to set the image quality to “RAW” so that you get the largest, highest-quality files that your camera can create.
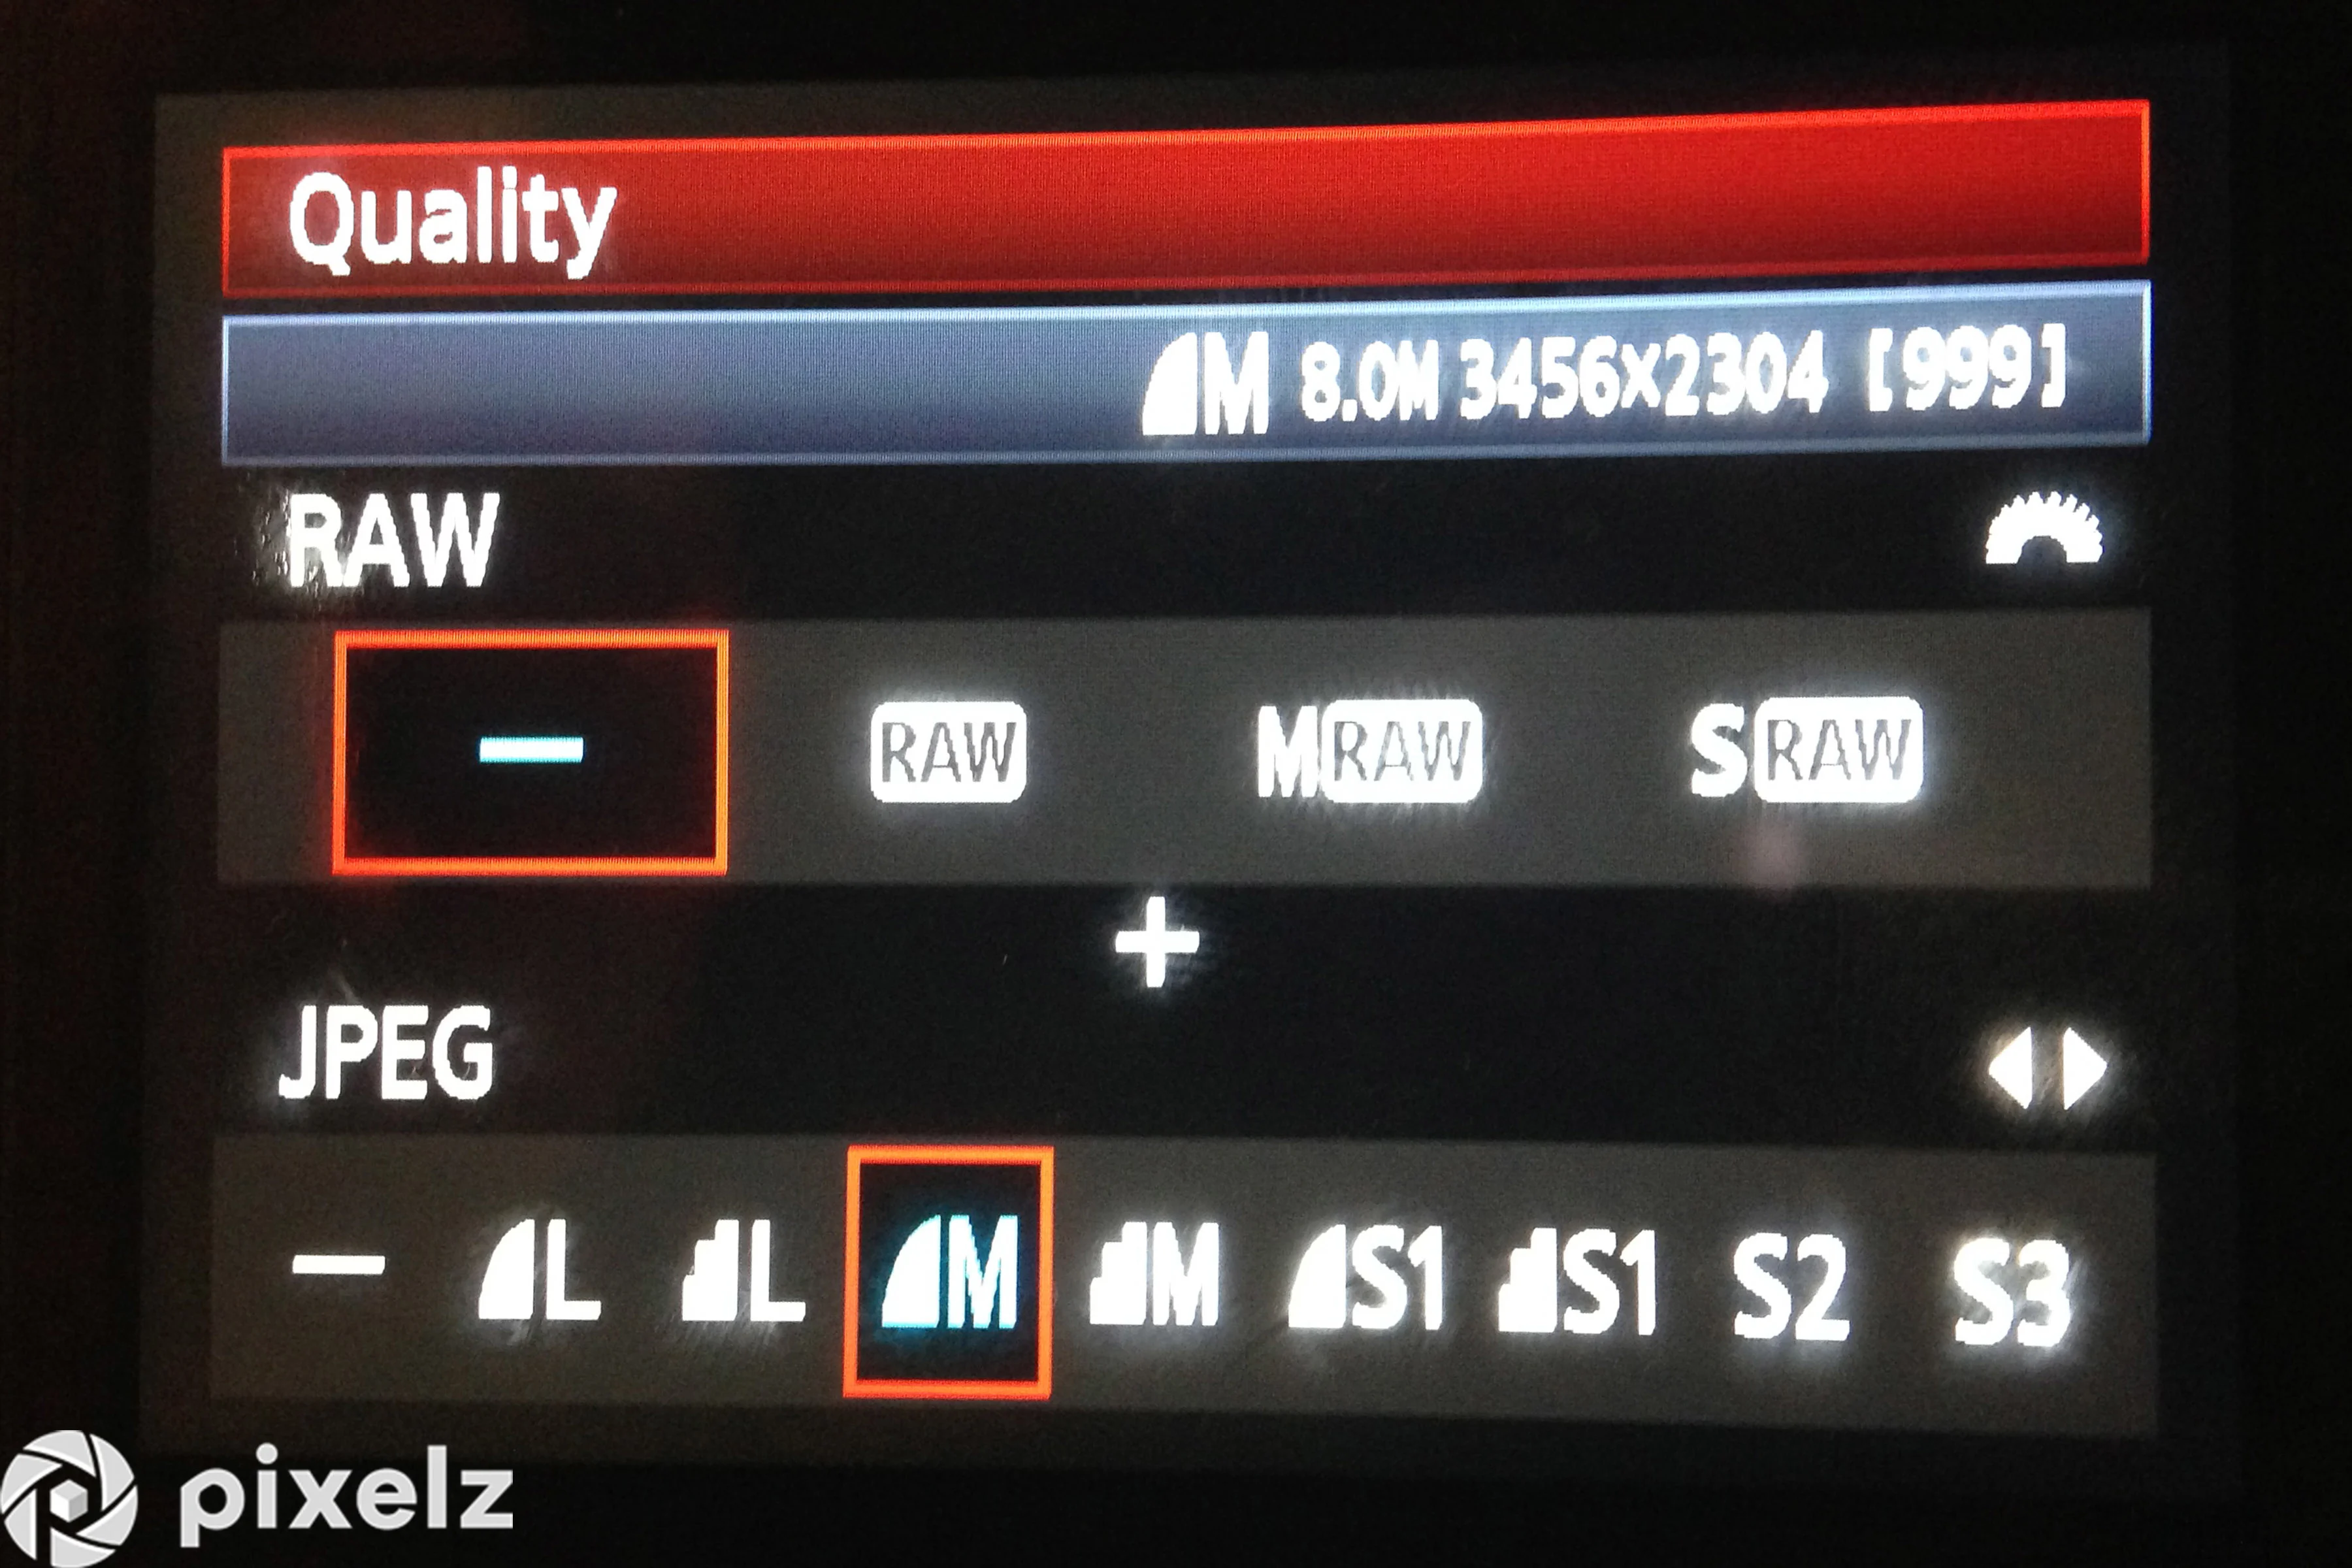
The image quality settings screen can be found in your camera’s internal menu area.
RAW files provide the maximum ability for editing, but RAW files are often large and can only be opened in certain types of editing software.
For the most part, “JPEG Fine” (medium or large) is perfect for images that will only be used on the web. JPEG files are easy to edit, take up less space on memory cards and hard drives, and can be quickly transferred between devices or uploaded to the web because of their smaller file sizes.
4. Shooting
When you have thoroughly measured and documented your studio setup and camera settings, it’s time to begin shooting.
One of the most important and helpful things that you can do when photographing your products is to shoot like Photoshop does not exist.
Don’t tell yourself that you or someone else can “fix” mistakes in Photoshop. Learn everything that you can to be able to create images that are as close to your desired final images as possible.
5. Post-Production Processing
After you have captured your product images, transferred them to your computer, deleted unwanted images from the catalog, and named and saved the files, you are ready to begin post-production processing to make your images look as professional as possible.
This is the simplest and most beneficial step to outsource, since digital assets are easily transferrable and the time and cost savings are significant. Pixelz, for example, offers easily integrated post-production processing with a 24 hour or less turnaround time.
Tools like custom order specifications and a quality inspector allow you to get high quality professionally edited product images cheaply, quickly and easily.
However, if you are on a budget that does not allow for outsourcing, you should implement the following processes to maximize your productivity. There are several tools and DIY techniques you can take advantage of to streamline your workflow.
Batch Process with Lightroom
Don’t waste time repeating the same adjustment on multiple images. Take advantage of professional image editing software, particularly the Adobe Creative Suite.
Color correction, for example, can be done en masse using Adobe Lightroom. Lightroom is intended for photography professionals and pairs perfectly with the better known Adobe Photoshop.
Take advantage of Adobe’s powerful image editing software
Lightroom is a photo processor and organizer that excels at batch processing a large amount of images. Use Lightroom to adjust the white balance, exposure and contrast on a single image and then synchronize your adjustments across an entire selection.
Utilize Photoshop “Actions”
The most well known and accessible image editing software program is Adobe Photoshop. In Photoshop, there is a section called Actions.
When you figure out all of the steps to make your images look the way that you want them to look, you can actually “record” the process by which you created the final image into an “Action” and apply that action to future images to automatically make the same edits with the press of a button.
Here is the Actions window, where you can press “Record” and save your edits.
Utilizing the “Actions” feature not only drastically speeds up the editing process, but it also creates a standard for how to edit your images consistently, leaving little room for mistakes and inconsistencies.
In addition to a basic edits Action, we also recommend creating one to optimize images for the web quickly.
Save Multiple Versions of Each Image
Before you begin editing an image, you should save the original image according to your file naming system if you haven’t already. Next, you should make your edits and then save the edited, large version of the image as a separate file.
Finally, you will also need to create a smaller web version of the file and save that as a separate file too.
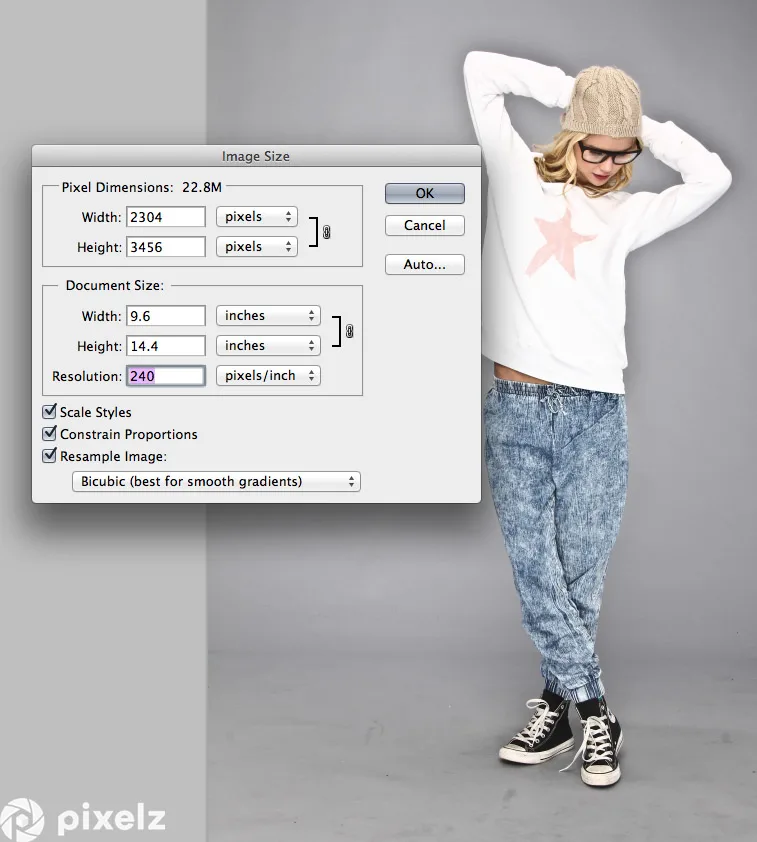
There is a certain way to optimize your images for print or internet use.
Along with cropping, this should be the last thing you do with your images because you want to have all of the information available while you are editing the image, before you start cropping information out.
Print files should be saved at full size and 300dpi (resolution)
Smaller web files should be downsized and saved at around 100dpi
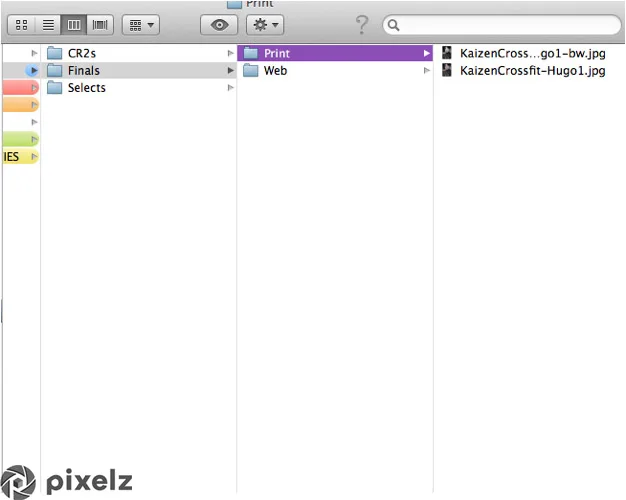
We have included identifying information in our images’ filenames to help us quickly determine each image’s version.
You should also label accordingly by including version information in the actual file name. For example, the original files in the image above are CR2 or “RAW” files. The images in the folder titled “Selects” are the images that were chosen for editing from the original CR2 files.
Each image in the folder titled “Finals” has a large, printable version and a smaller web-ready version saved there:
the larger versions are named: ProductName_CompanyName_Color-print.jpg
the smaller versions are named: ProductName_CompanyName_Color-web.jpg
However you choose to save and name your files, remember to never save over them or all of your hard work may be lost forever.
Final Word
Improving your company’s productivity is a lot of work; that’s why large fast fashion retailers outsource the majority of their labor. If you are doing everything yourself until there is more breathing room in your budget, improving your workflow methods is essential to becoming more efficient.
The average fashion retailer spends two weeks preparing their products to be sold online, and you can achieve that level of productivity, too.
Optimizing your organization, preparation, test shooting, shooting and post-production processing will save you time and money in the short and long term.
Remember, it is all a matter of learning, doing and fine tuning. You will get better with practice. Your team will grow along with your business. The more finely tuned you become, the faster you will rise to the top.

Thomas Kragelund is the CEO and founder of Pixelz, a leading product image solutions partner for internet retailers, bloggers, designers, photographers and webmasters worldwide. He has been working in ecommerce for the last 15 years. Sign up today and get 3 product images edited for free.


